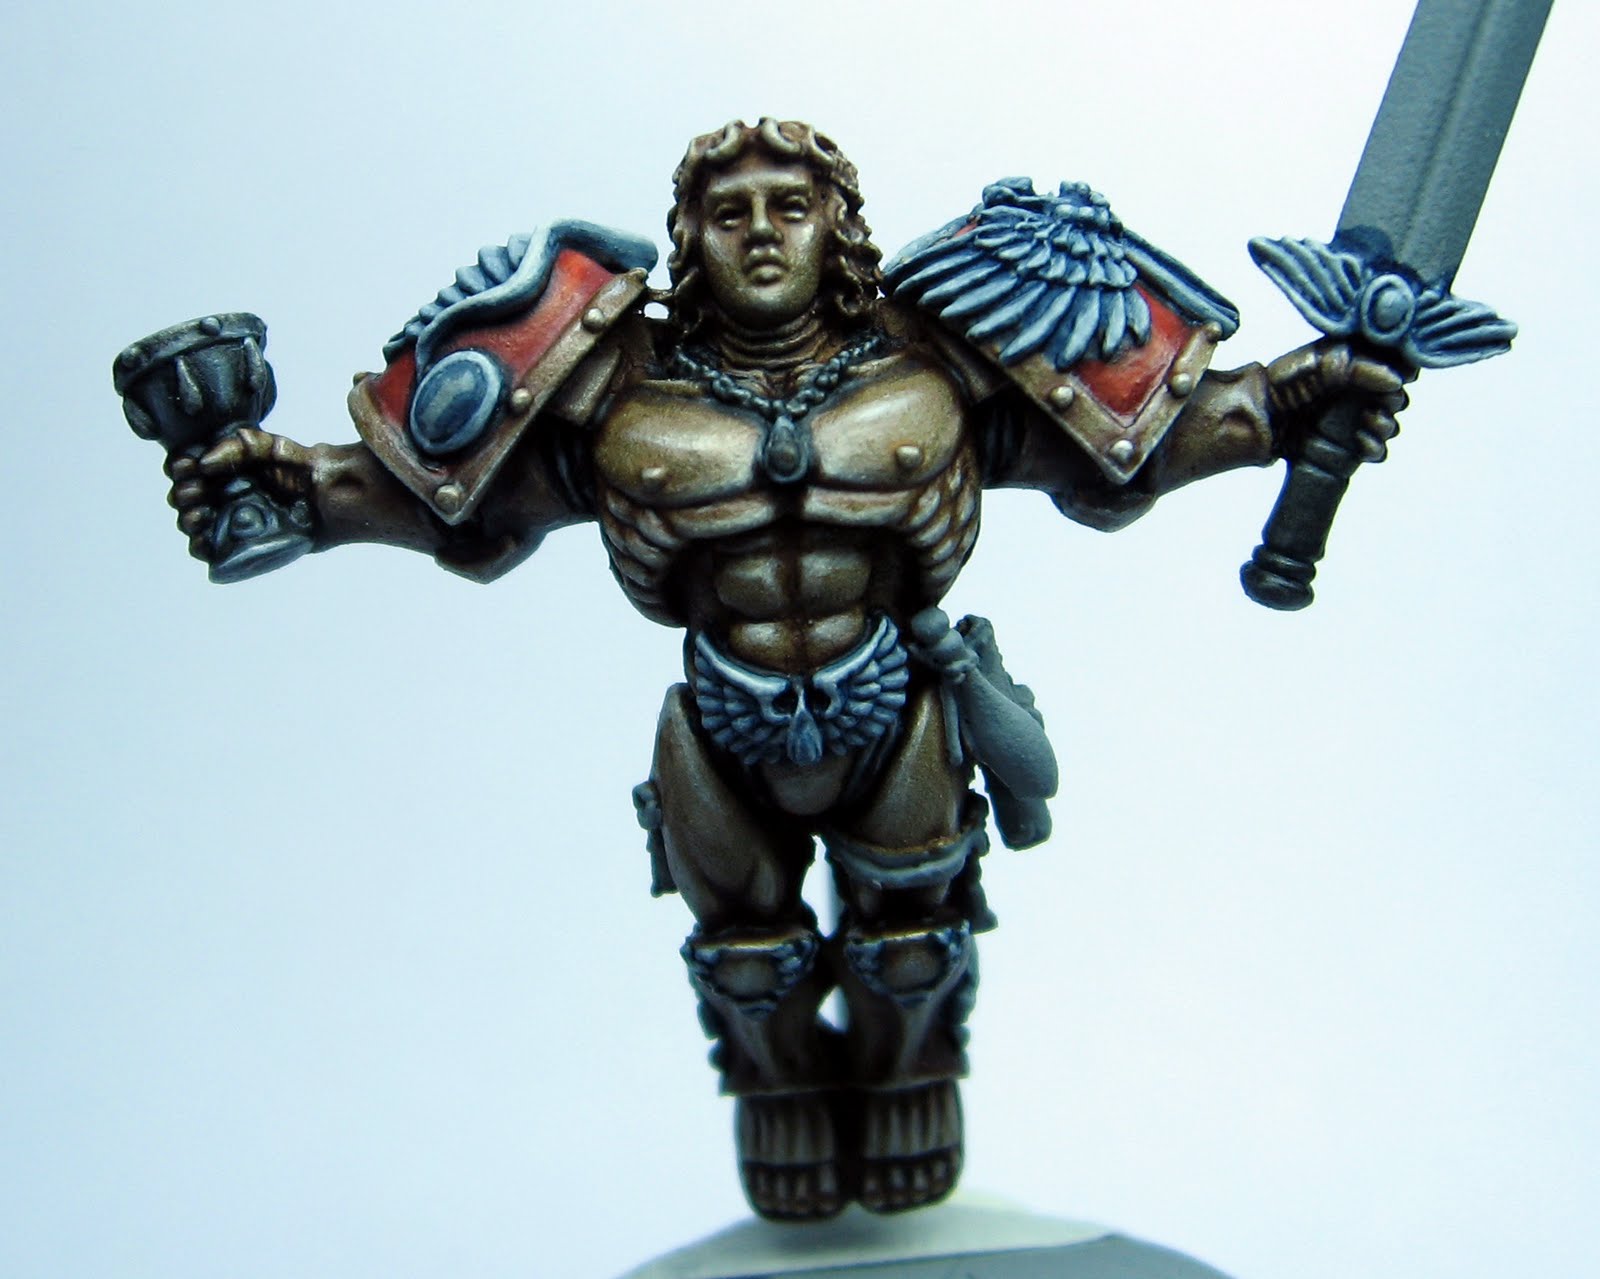
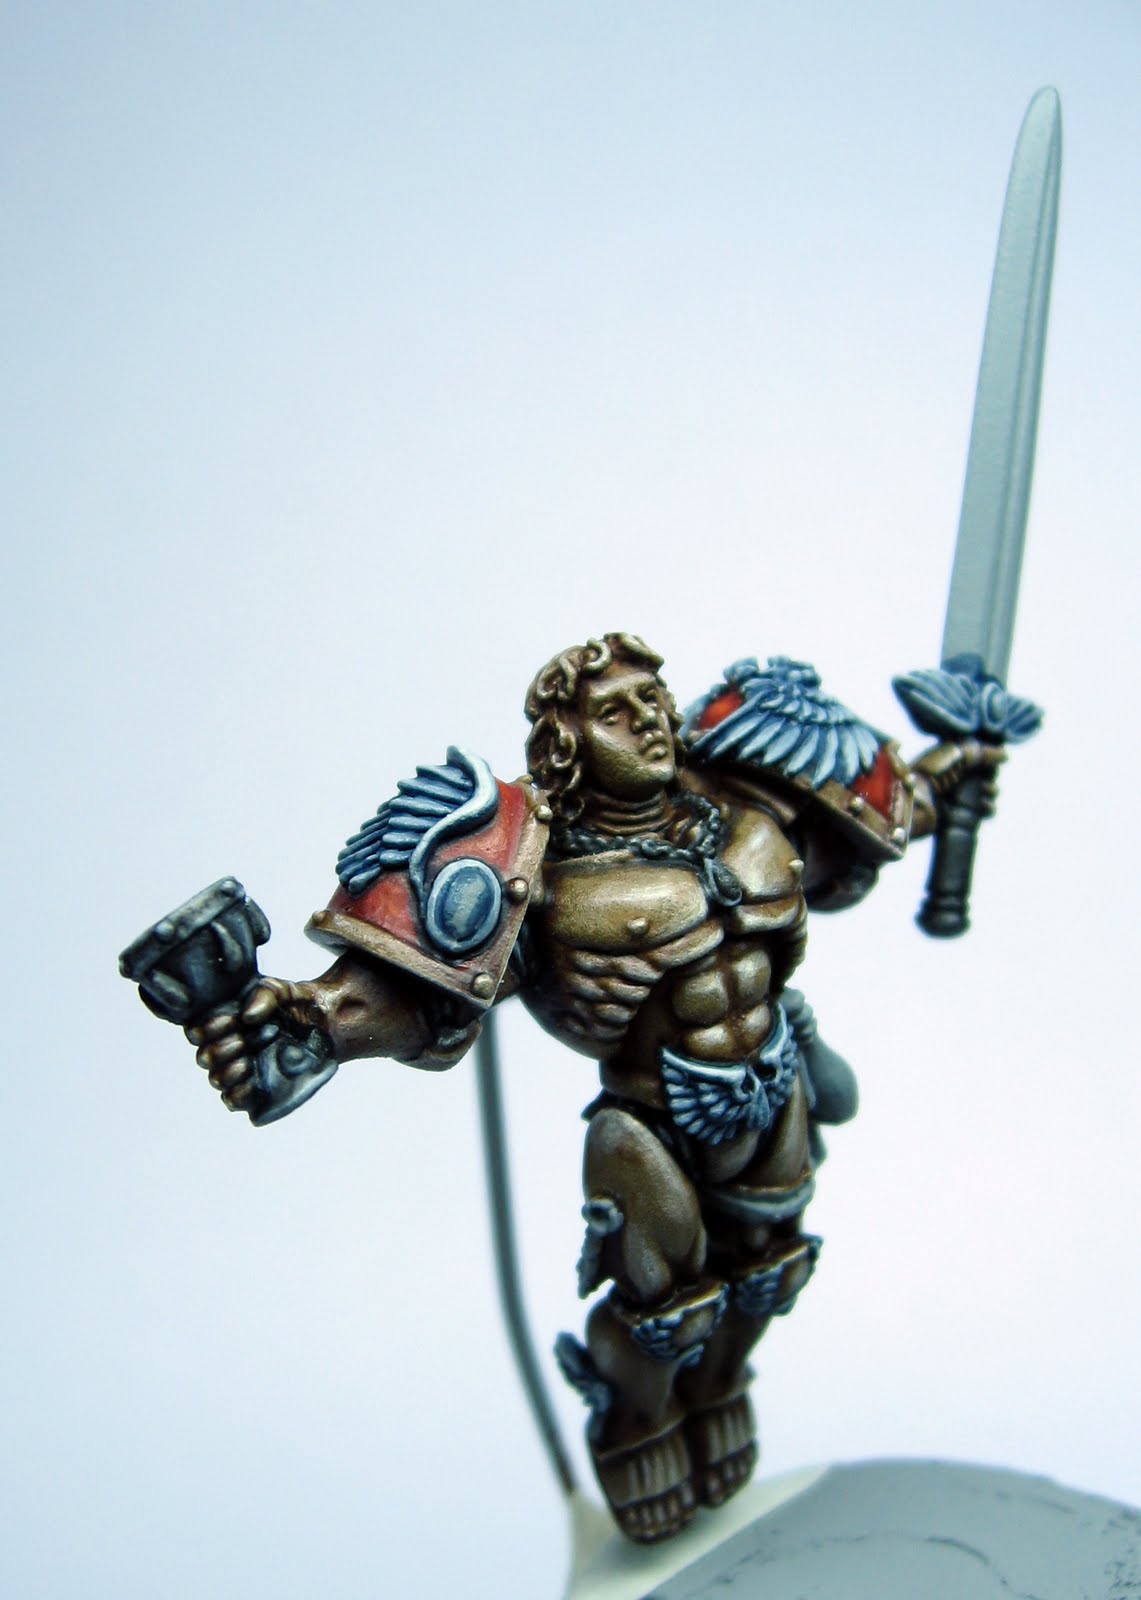
I believe I've promised some time ago that I'm going to collect the mini tutorials for the various parts of this mini in a glorious mega tutorial sort of post so here it goes.
NMM Gold:
- Grey basecoat ( I had used a medium grey primmer on this mini so it served as the basecoat)
- 2 washes of Gryphone sepia
- Highlight with Bleached Bone
- Highlight with Skull White
NMM Silver:
- Basecoat with a 1:1 mix of Adeptus Battlegrey : Astronomicon Grey (depending on how dark you want you want your mettalics you can add more or less of each colour and even use straight Adeptus Battlegrey or Astronomicon Grey)
- 3 washes of Badad Black
- Highlight with Codex Grey
- Highlight with Fortress Grey
- Highlight with Skull White
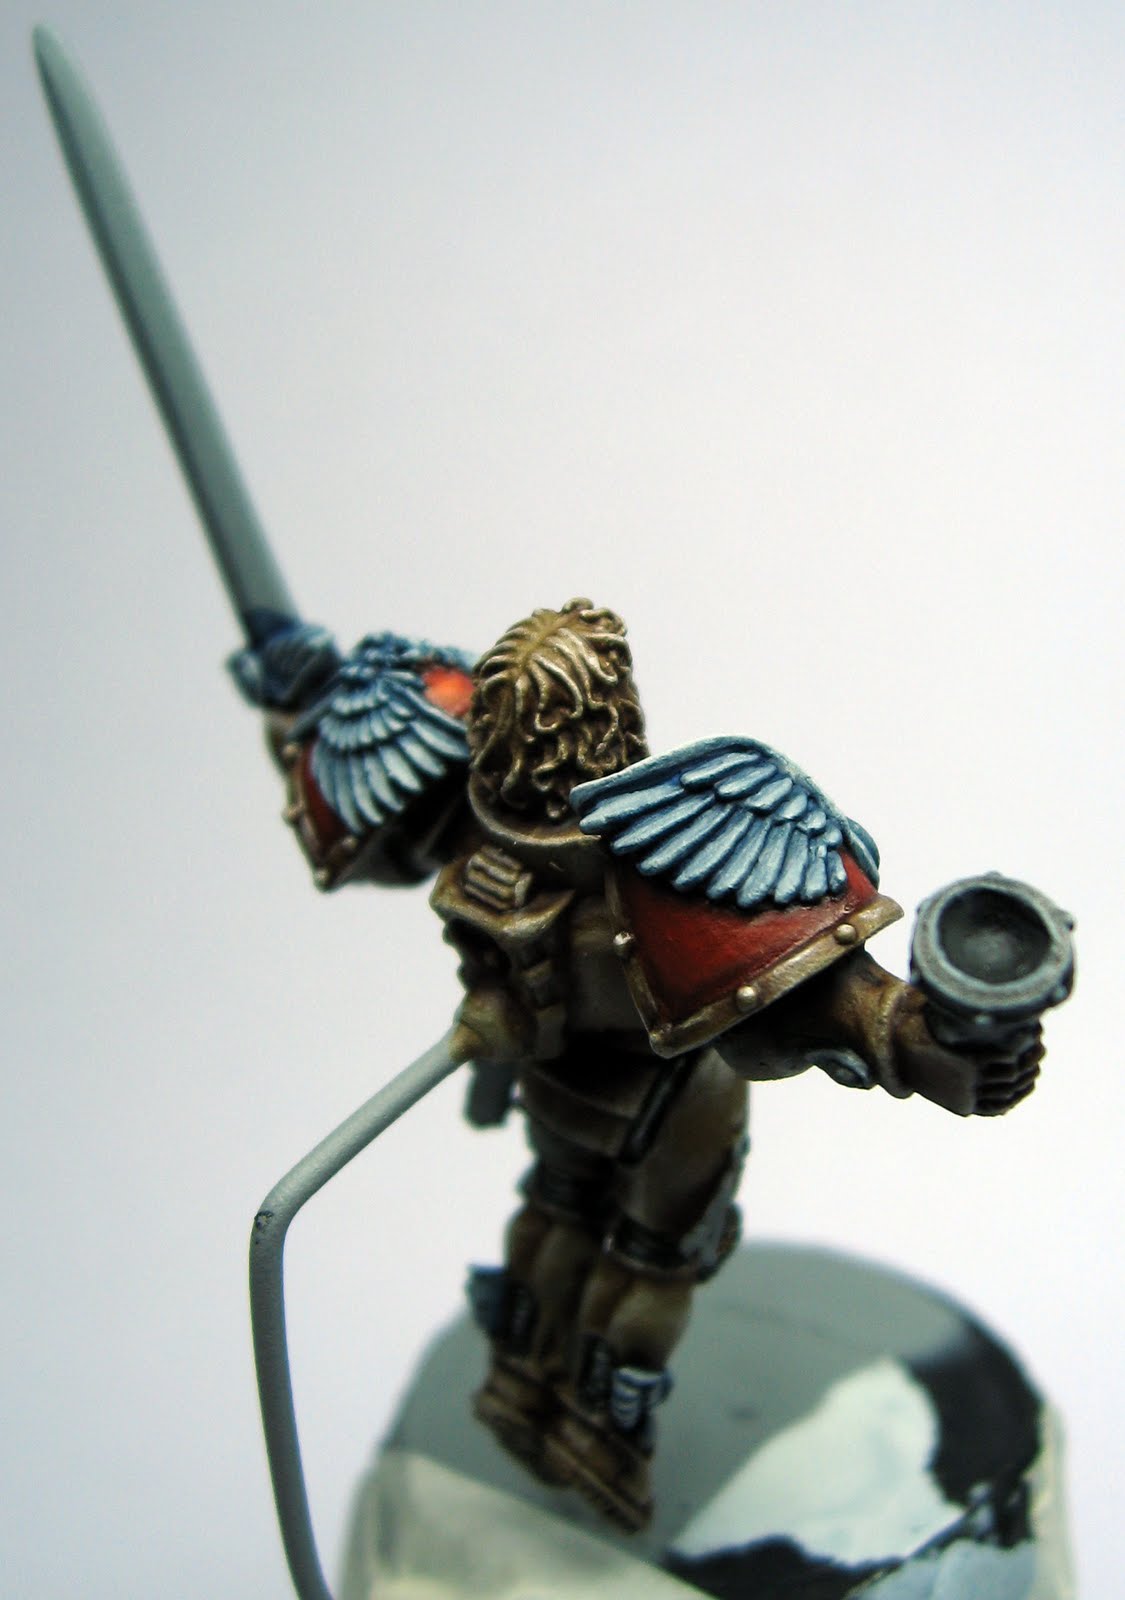
Blue glow on jump pack thrusters:
- Basecoat with Astronomican Grey
- Wash with Asurmen Blue
- Highlight with Astronomican Grey (I think that Fortress Grey would work as well if not better due to less pigmentation)
- Highlight with Skull White
- Glaze with a mix of 1:2 Asurmen Blue:H2O
- Highlight with Skull White
Wings:
- Basecoat with a 1:1 mix of Adeptus Battlegrey : Astronomican Grey
- Wash with Asurmen Blue
- Highlight with Codex Grey
- Highlight with Fortress Grey
- Highlight with a 1:1 mix of Fortress Grey : Skull White
- Highlight with Skull White
- Paint recesses with a 1:1 watered down mix of Chaos Black : Necron Abyss
- Touch up highlights with Skull White
Scrolls and purity seals:
- Calthan Brown (shade)
- Talarn Flesh (basecoat - painted everywhere except in deep recesses)
- Highlight with Bleached Bone
- Highlight with Skull White
Gems:
- Tausept Ochre basecoat
- Highlight with Sunburst Yellow
- 2 washes of Baal Red
- Highlight with Sunburst Yellow
- Highlight with Skull White
- Round gems also received white reflective dots
Blood vial:
I just followed the 'Eavy Mettal tutorial for Sanguinor from UK White Dwarf 364.
Sword Blade:
I just followed the 'Eavy Mettal tutorial for Sanguinor from UK White Dwarf 364. A word of caution though! If you're going to use that tutorial foi the sword blade keep in mind that you will end up with a different colour than that shown in the tutorial pictures. The paint mixtures are quite off and even though I lightened my base colour mix it still ended up darker than that shown in the pics. Also keep in mind that you might have to blend more than the tutorial suggests.
Εμφάνιση αναρτήσεων με ετικέτα NMM. Εμφάνιση όλων των αναρτήσεων
Σάββατο 2 Οκτωβρίου 2010
Sanguinor - FINISHED!
This is it my friends: the grand finalle! And what a ride it has been. I can now safely say that this is my best mini so far and the mini that has taught me the most things about painting. It's by no means perfect but it has helped me improve as a painter and given me the courage to tackle more complex techniques. However I shouldn't be rambling here. On to the pics:
Πέμπτη 30 Σεπτεμβρίου 2010
Sanguinor - scrolls and purity seals finished
After a rather minor update last time I thought it was time for a major one. I'm really pleased with how the mini is progressing though I'm not so pleased with the pics I took this time. Anyway I'm so eager to show you the progress I'm afraid you'd have to do with half-decent pics this time. I am actually begining to see the finish line on this project as only the text on the scrolls, the vial and the sword remain. Let's race to the finish!
Παρασκευή 24 Σεπτεμβρίου 2010
Sanguinor - minor update
I've finally managed to defeat my laziness and pick up my brushes! I didn't do much work and it was not very enjoyable since I painted stuff that should have been painted in previous stages, namely the round gems and the sword hilt. However I'm now faced with the more enjoyable parts like the scrolls and purity seals. Not so sure about the round gems though. I may leave them as they are or add a white highlight at the top corner or... well I really don't know so all ideas are welcome.
Here's a pic with white reflection dots photoshopped onto the round gems. Take a look and tell me what you think. Should I go withe the dots?
Τρίτη 7 Σεπτεμβρίου 2010
Sanguinor - gems finished
Since I was pretty happy with how the test gems turned out, I went on and painted the rest of them in the same way. I'm still undecided on the round gems. I am thinking of doing them in the same way as the other gems - glowing towards the middle. I'm unsure of how it will look however since this is an unconventional aproach for round gems. If anybody has tried something similar let me know how it worked out.
Σάββατο 4 Σεπτεμβρίου 2010
Sanguinor - gems test
This project is moving at snail pace lately but at least I managed to paint something on the mini. I painted a couple of gems to test out the technique I "borrowed" from Dezzarfox. I slightly altered the technique and I must say I'm very pleased with the end result so the rest of the gems will be painted in the same way.
Paint recipe for the gems:
- Basecoat Tausept Ochre
- Highlight with Sunburst Yellow
- 2 washes of Baal Red
- Highlight with Sunburst Yellow
- Highlight with Skull white
Paint recipe for the gems:
- Basecoat Tausept Ochre
- Highlight with Sunburst Yellow
- 2 washes of Baal Red
- Highlight with Sunburst Yellow
- Highlight with Skull white
Σάββατο 28 Αυγούστου 2010
Sanguinor - got wings, will fly (with added tutorial for the wings)
And yes, as you might have guessed it, the wings and feathers etc are finally finished. That final highlight and touching up was much more time consuming than I expected but at least I can say I like the end result.
Recipe for the wings:
- Basecoat with a 1:1 mix of Adeptus Battlegrey : Astronomican Grey
- Wash with Asurmen Blue
- Highlight with Codex Grey
- Highlight with Fortress Grey
- Highlight with a 1:1 mix of Fortress Grey : Skull White
- Highlight with Skull White
- Paint recesses with a 1:1 watered down mix of Chaos Black : Necron Abyss
- Touch up highlights with Skull White
I found out that for the jump pack wings it's better to use a larger brush (size 2 or GW standard brush) for all highlighting except the final Skull White highlight and even at that stage I recomend the use of a smaller brush for the extreme edges only. Using a larger brush will not only make highlighting easier but it will help you manipulate paint towards the edges of the feathers.Furtheromore it will help build up some texture on your highlights to emitate the texture of the feathers in the wings. For the rest of the feathery bits you can highlight normally as the individual feathers are too small to use a large brush.
Τρίτη 24 Αυγούστου 2010
Sanguinor - wings almost finished
After a small absence due to a bit of vacation and a lot of mountain biking I managed to do some work on Sanguinor. At this stage the wings and feathery stuff are almost finished though I'd have to add the final pure white highlight and do a bit of touch up. I'm really happy with how the blueish shading worked out. I hope you like it as well.
Εγγραφή σε:
Αναρτήσεις (Atom)
