Δευτέρα 31 Ιανουαρίου 2011

Grot bomb - finished & CMON link

Wow, that was quick! I went for a different approach here painting all the colours with some basic highlights and then using oil paint washes to shade the panel lines and provide some weathering as well. The weathering apears a bit heavy on the lighter surfaces but as it's an orky vehicle I think it's ok. The only exception was the grot pilot which was painted without any oil washes. I wonder if you can guess the inspiration now that the mini is finished...? An extra hint is that even the paint chipping was copied from... whatever the inspiration was.

CoolMiniOrNot voting link.


Σάββατο 29 Ιανουαρίου 2011

Grot Bomb - PIP

With a lot of help from the suggestions of the folks who commented on my previous post I finally decided on a paintscheme. At the time being only the base colours have been airbrushed and there's still a lot of work to do. Can you guess the inspiration for the paintscheme...?


Παρασκευή 28 Ιανουαρίου 2011

New project - I need your help!

And what a project it is! One of the best Forge World minis and the mini with the best piece of fluff IMHO. Ok it's not a huge superheavy but it's full of character and the fluff about the grot pilot not being smart enough to understand that it'll die when the bomb hits its target and explodes is hilarious. I mean, come on, who doesn't love Grots? Inventing such funny creatures and putting them in the grim dark setting of 40k was pure genius!

Now though it's time to move on and explain to you your mission (should you choose to accept it). I need your brains. I don't mean that in a zombie-brain-eating way but more in a give-me-ideas-and-suggestions way. Now that you know that your brains are not in imminent danger of consumption you can relax and propose paintschemes for my grot bomb. I'm thinking of the classic "red ones go fasta" paintjob with some metal plates painted in contrasting colours, the checker pattern painted in black & white and the shark's teeh painted in white. I wonder if it's a bit lazy and obvious though, so all suggestions (and even better all suggestions with links to relevant pics) are welcome.


The mini:


My attempt at a not so boring base:


Τετάρτη 26 Ιανουαρίου 2011

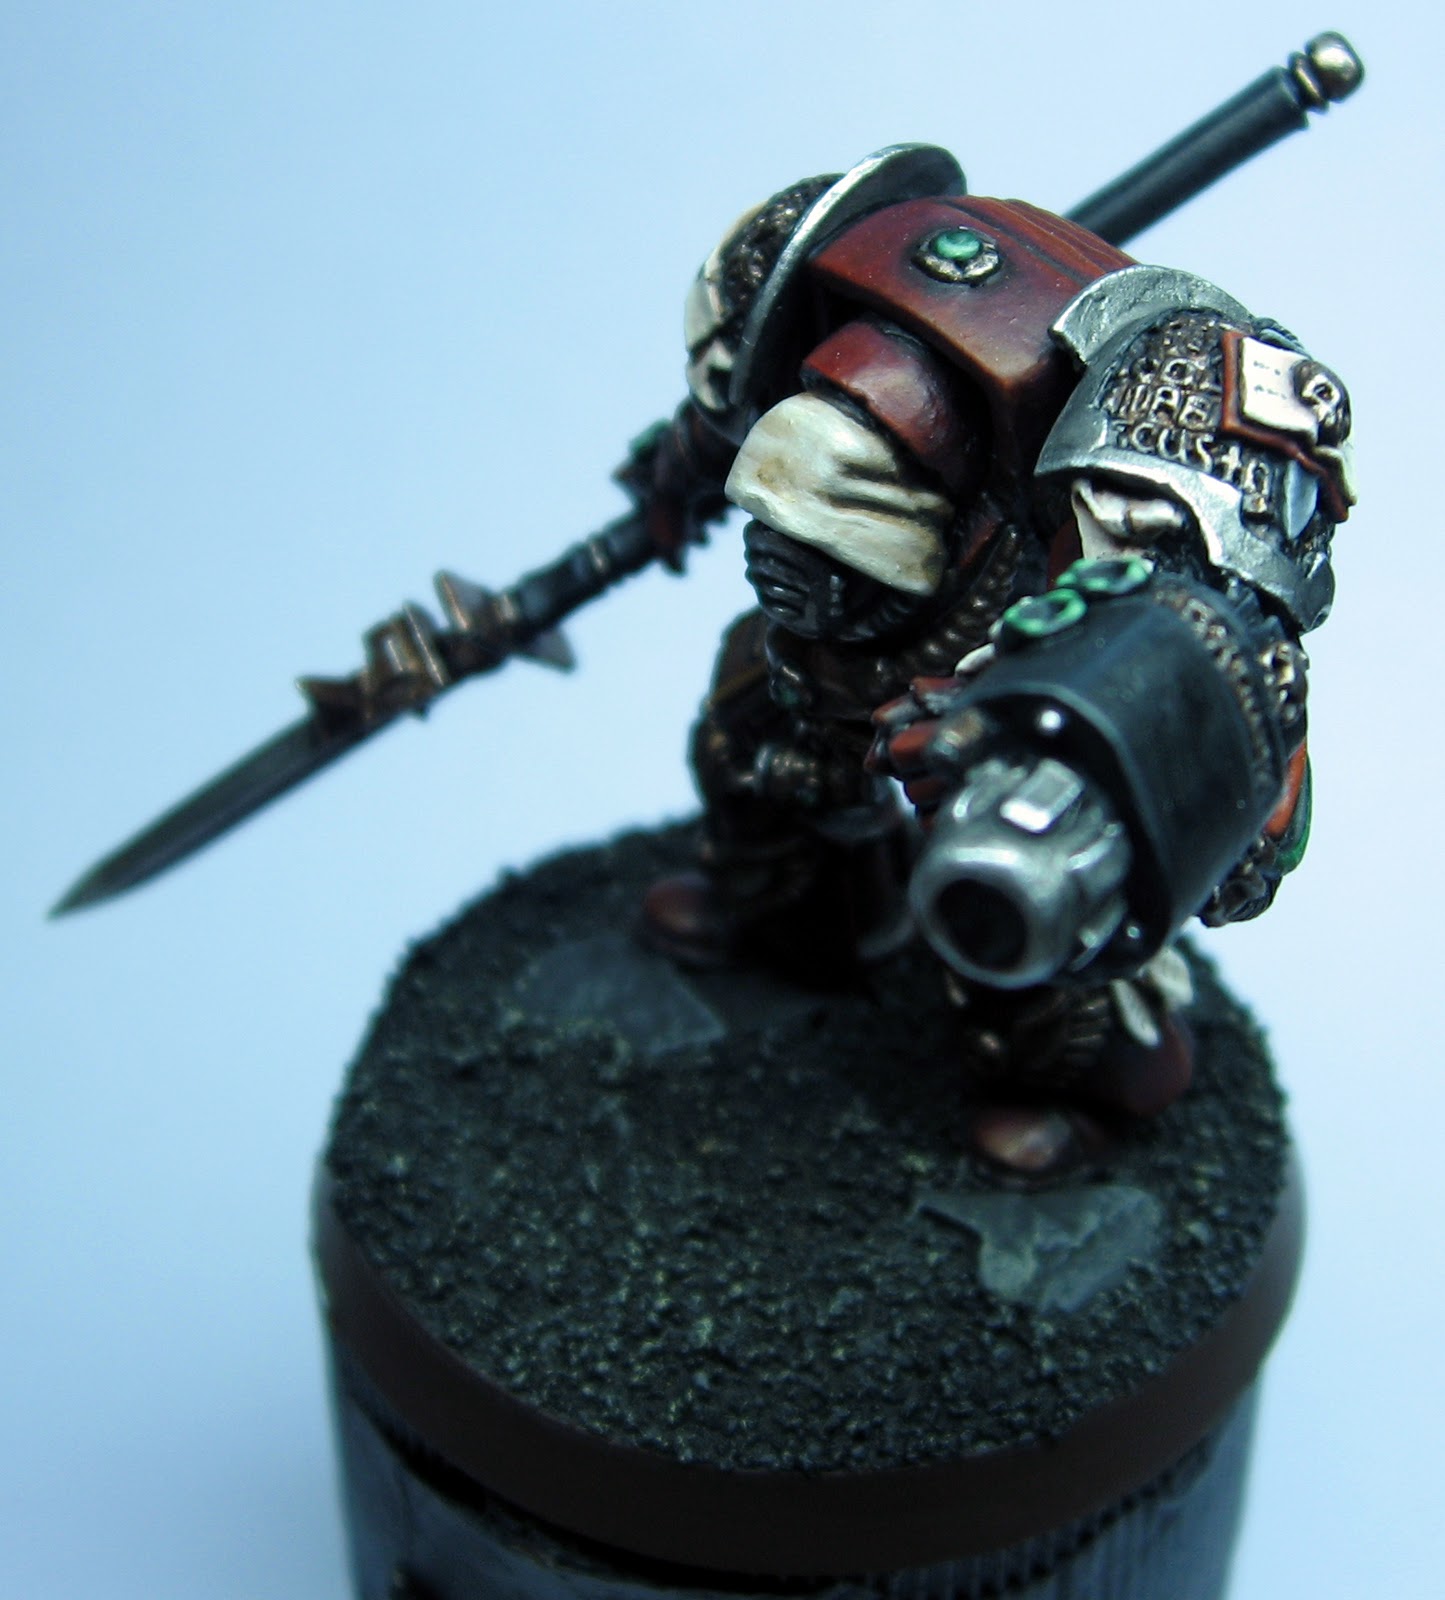
Inquisitor in terminator armour - final pics and CMON link

Varnished and ready to go in the display cabinet! I'm not so happy with the varnish but it's by no means a disaster. I'll just have to remember to aply it more sparingly in the future. Anyway that's all for now.

CoolMiniOrNot voting link.


Δευτέρα 24 Ιανουαρίου 2011

Inquisitor in terminator armour - finished & a tutorial

It's finally done! I'm pleased with the result but I'd like to hear your comments and any sugestions for last minute changes before varnishing. Since some people have asked me for the recipes for certain colours I'll also write a tutorial here.


Red:
This will need some explantaion since I used a somewhat combined technique. The basis was layering but with very thin paint and concentrating the highlights on the uppermost areas. Think of it as a mix of layering and directional highlitghting. I basecoated with a mix of Chaos Black and Scab Red, highlighted with Scab Red and then washed the mini with a mix of Deval Mud & Badab Black. For subsequent highlights I used all of GW's reds moving up to pure Blazing Orange for the final highlights. A thin glaze of Baal Red unified the colour before the final highlight. In general the use of a thin glaze before the final highlight is an easy and effective way to "tie"the colours together. Another important thing to remember here is when you're moving form darker to lighter colour it's better to use an intermediate highlight stage with a mix of the two colours. In these case the highlight sequence after the wash was:
- Scab Red
- Scab Red: Red Gore 1:1
- Red Gore
- Red Gore: Blood Red 1:1
- Blood Red
- Blood Red: Blazing Orange 1:1
- Thin Baal Red Glaze
- Blazing Orange
This may seem like an overkill but actually the armour was very easy to paint and it took me only about 2 hours.

Hood:
This also needs a bit of explanation. It was my first time trying this colour so there was a bit of experimentation. The idea was to use an ochre as a midtone to achieve a more "yellowy" cream colour. So here's how it goes:
- The hood was basecoated with Calthan Brown
- A second basecoat of Tausept Ochre was applied covering everything except deep recesses
- The hood was highlighted with a 1:1 mix of Tausept Ochre: Dheneb Stone
- A second highlight of Dheneb stone was applied
- The hood was washed with Gryphone Sepia
- A wash of Devlan Mud was applied directly in the recesses
- The hood was highlighted with Bleached Bone
- A second highlight with a 1:1 mix of Bleached Bone & Skull White was applied
- Pure Skull White was used for the final highlight

Gold:
- Basecoat with a 1:1:1 mix of Tin Bitz, Dwarf Bronze & Scorched Brown
- Apply a second basecoat of 1:1 Tin Bitz & Dwarf Bronze everywhere except in deep recesses
- Wash the recesses with a 1:1 mix of Deval Mud & Badab Black
- Highlight with a 1:1:1 mix of Tin Bitz, Dwarf Bronze & Mithril Silver
- Highlight extreme edges with a 1:1 mix of Shining Gold & Mithril Silver


Pics:


Inquisitor in terminator armour - almost there

After almost a full day's worth of painting the mini is almost done. All that's left to do is finish the scrolls and the leather cover of the book and paint the sword icon on the shoulderpad. I especially like how the hood turned out and also how the face looks under the hood. What you think of the mini so far?


Κυριακή 23 Ιανουαρίου 2011

Inquisitor in terminator armour - gold and black areas finished

I finally made some progress on the Inquisitor. Everything that's going to be gold or black is finished now even though it might be hard to spot the differences between the highlighted black areas and the black areas that are just unpainted. For the gold I used the same technique that I used on the Dark Eldar Archon while for the black I started with a mix of Chaos Black & Graveyard Earth which I then shaded with a wash and highlighted by adding Comando Khaki in the mix. That's all folks. Time to comment!